Monday, 20 June 2016

Plein air at the allotments

Plain air painting on Wednesday

I almost spent the day catching up with stuff, you know the kind of thing I'm sure, let's face it, there is always something (or lots of things) that need doing, and it's too easy to loose a day. 
I packed the minimum and off I went to our local allotments. It's not far from the house, so no need for the car, it's just a short walk away.
I always feel a bit guilty leaving the dog at home, but if I take her with me I just get distracted and can't expect her to lie beside me and not snaffle about! 


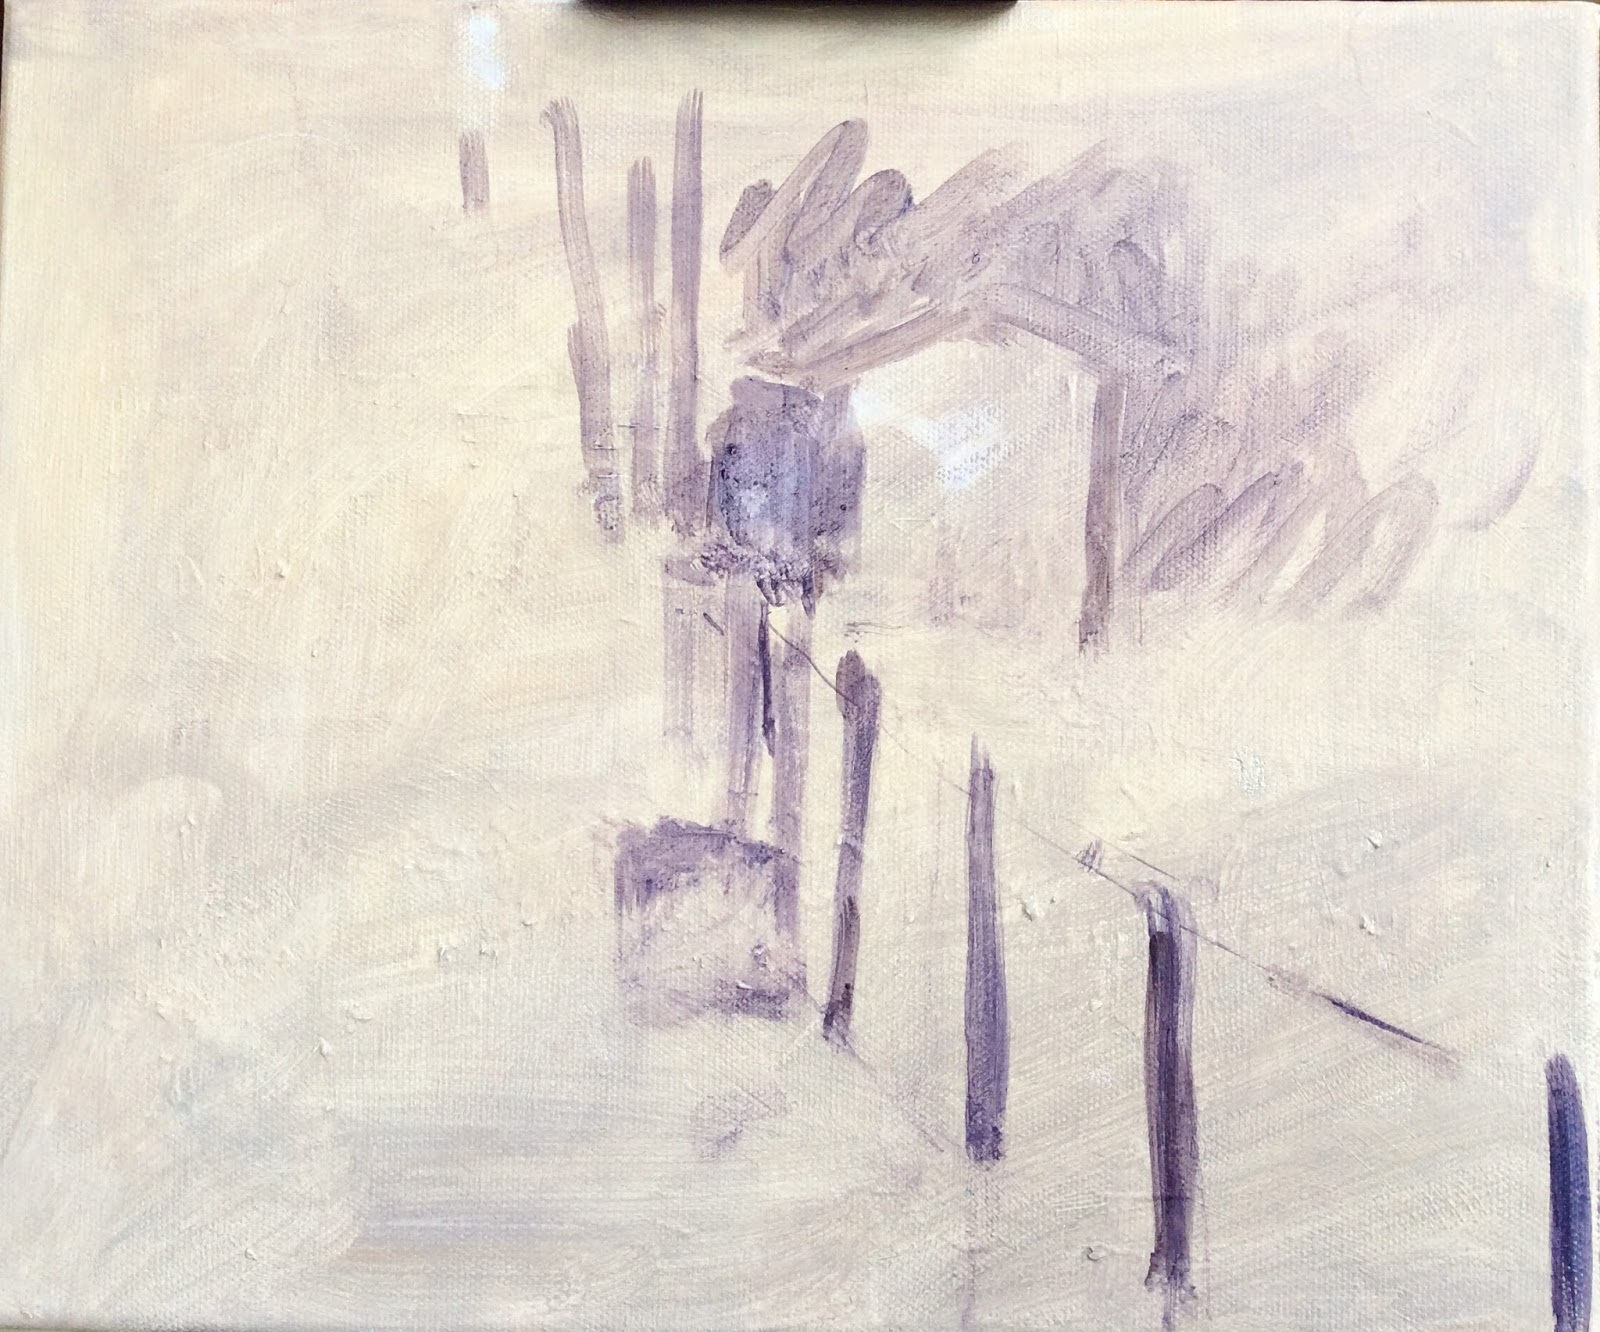
I set up my light weight easel, secured my 10 X 12 inch canvas and made a start.

I had previously prepared my canvas with gesso then a layer of pale ochre, with a little shadow colour in places, (which caught the corner of my brush) just to give me a mid tone base on which to work. The first thing I do is establish the basic shapes, then perhaps a few of the dark areas using the colour shadow very dilute. 


I quickly add the second shed and a few tree trunks and some darks, this completes my basic composition. I can alter anything at this stage, so if the scale of things is not quite what I want, I can alter things, once I add colour, it becomes more difficult.


At this stage I like to block in the areas in shadow using the colour Bluebell
I prefer to use this lovely colour so that any gaps left after placing colours on top reveals this colour I reach this stage in the first 10 minutes of painting, the sunshine is established si if it becomes overcast, I can stick to my original plan, even if the sun just peps out now and again, I have the most important information down.


I now begin to add colour, just blocking it in, nothing detailed. I add the bright sections and retain the dark sections.
I am now at the stage when if the sun goes in and the light becomes flat, I use the tones in my painting to guide me, I avoid chasing the light. This can be a big mistake, but once you are out there, and getting carried away with it all, its quite hard not to paint the light as it changes. Limiting the time outside helps.
I continue to add more definition and a few definite clean shapes, adding darks using more of the colour shadow.

I continue using this colour to define the posts and dark sections, as well as everything in
shadow. I now build up the painting adding the light colours.

Final details can now be added, the canes, sticks, blobs of light, leaves, that sort of thing. The temptation is, to continue to poke away adding more and more details, but the longer I work on the painting, the more the light will change and with it, the danger of chasing it! Too many details won't enhance my painting, they will just distract from the simple beauty of the scene which is what first attracted me to it, so this is when I stop.

I plan a few more trips to the allotments, if you enjoy reading my blog, I will be happy to share them with you. (I just have to remember to take the photos) it was certainly good use of my time because it has rained ever since that trip and each day I wake to the steady drip of rain.The forecast is for rain all week, the plots will be twice as big, the greens will be lush and the sheds become overgrown with plants. Another challenge awaits....

Tuesday, 14 June 2016

Having fun painting figures

I thought you might like to see my interpretation of the slightly abstract figures which I planned to use as my reference for one of my demos at the Patchings Art Festival last week end. I used acrylics and pastels and this was the result.
The colours were so rich and sumptuous, Im now not sure if I prefer this one to the original! This just shows how good it is to experiment, you just never quite know what will happen.


Many of my demos were watercolour and although I painted flowers, which are always popular, I also painted children. I love the challenge of painting people, telling a story and most exciting, adding sunlight. For this  painting I had a dull little  photo as my reference, with no sunlight, it was a flat grey day, so I showed the audience how I use a photo but decide on the light source and paint my figures in lovely sunshine.

STEP 1
This is the next stage after its dry

STEP 2
Then another demo along the same lines. I used a limited palette and showed how I mix skin tones, then gave a few tips about painting flesh and making figures look realistic. I think figures in watercolour must be my favourite. I enjoy other subjects, but the challenge of figures is such fun!


Wednesday, 25 May 2016

Preparing for the Patchings Art Festival in June

Its that time of year again when I prepare the 15 paintings which I shall demonstrate at the show, this year over three days rather than four. I shall be there from Thursday 9th June till Saturday 11th in the Artist and Leisure Painter magazine marquee number 25.

I have decided to use finished paintings as my reference and show my painting process in creating them as well as my thought processes whilst developing a painting. Each demonstration must be completed in about half an hour, which always keeps me on my toes I can tell you. So whatever I plan to do must be achievable within that time frame.

I am also using Daler Rowney paints because Dalers sponsor the subscriptions for both The Artist and Leisure Painter magazines at the show. This means that anyone taking out a subscription for either magazine at the show, can take home with them a choice of art materials (all of which I use at the show) Its a really good deal and well worth doing.

This is a painting I shall be basing one of my demos on.


I don't know why, but this is one of my favourite paintings, I love the balance of it, the semi abstract nature of it and the movement it suggests. I have not framed or mounted it, I think because deep down I don't want to sell it!
For my demo I shall probably use acrylic, although I might add some pastel on the day. I shall be painting on Bockingford watercolour paper, which has a really lovely texture that will enhance any pastel work I might add. I don't plan too much what I shall do, because it keeps my thinking fresh on the day.

This is another painting I shall have on display. I am going to use collage and acrylics with acrylic inks too. It should be challenging to complete something reasonable within half an hour! It obviously won't be as 'finished' as this one, but it will be well on its way.


If you do fancy visiting the Patchings Show its held at 
The Patchings Art Centre, Oxton Road, Calverton (near Nottingham) NG14 6NU I shall be in Marquee number 25 and I shall be doing 5 demonstrations each day10.30 11.30 1.30 2.30  and 3.30

Monday, 11 April 2016

Warminster Art Society Painting workshop

What a great day we all had on Saturday, and what a fun group this is!
I am thrilled to tell you that it was such a success that they have booked me for next year already! Thank you!

The workshop was using acrylics, and although some people had not had much experience using them, they all came prepared with their canvasses, paper and so much enthusiasm that we were bound to succeed. This group also enjoy the odd slice of cake during the day which seemed to keep their energy levels up because they worked hard and concentrated all day.


Our theme was painting children paddling and this was my demonstration after the first stage of  basic 'blocking in'
You can see examples of 2 of my finished paintings using these techniques, so its useful to see the sort of result we aim to achieve on the day as well as a more 'worked' painting. I usually take the minimum of equipment and paint in a similar way to the way I paint 'plein air' my aim is to avoid all details and concentrate on purely the important elements of the subject using simple brush strokes to achieve this.

Once this stage is reached its a question of adding more colour but maintaining the tonal values. 


This is the stage my painting reached once I add simple brush strokes without too much detail.


This is my final painting once I added a bit more. I could keep working on it and build it up so that it was pretty detailed, but I think that would make it looked overworked and it would loose its impact. 

I had a lovely day with you all in Warminster and I hope you were inspired to use these techniques in the future. Well done everyone.

Monday, 4 April 2016

Doodling with watercolour

Experimenting and 'doodling' with paint is a great way of discovering ways to develop your skills using watercolour. Once you decide that the painting you are about to do is not going to be a 'painting' as such, but a discovery, play time if you like, then the pressure is off and you can just enjoy pushing your own boundaries.
This is the kind of thing it can lead onto and the sort of direction which you might find fun.

Summer Iris
Before embarking on something this complex, this is a great little example of something you might like to try.

First of all, decide on perhaps a flower you like, and the colours you want to play with. Limit the size your going to work on - say A4 If you have a flower in front of you, or failing that, a photo, all the better, but avoid 'copying' it.
Work quickly so that the entire study remains wet in places, allowing the paint to escape into adjoining sections. Don't worry if it looks a bit wonky, or isn't exactly what you intended, and don't scrap it!
For this I used my Pyramid brush, but you an use any brush you have to experiment with.

Step 1
OK, now is the time to add another layer, darken areas, wash on a background colour allowing the colours to merge and perhaps flick paint onto the painting or speckle it on. Have a bit of fun and try and get some texture and a bit more depth to it.
I like to use the Golden Leaf brush to stipple the surface inviting colour to move into it. Its important that you use a big brush, that opened out so that the speckled sections are not too small. If you poke about with a small brush you can only work in a very small area so the rest of it is all drying as you are concentrating on your tiny bit. Try and look at the whole study, not just the tiny bit you are working on.

Step 2
So now we are at the stage that its starting to look interesting. Its time to add another colour and move things up a gear. If you are using different colours, always try a small sample of the colour you plan to use and place it near a section in your painting that has the most colour variation in it.
You can now see if this is likely to work or not. Never paint a random colour onto your work and 'hope' it will look good. Its fine if you know its going to work, but if in any doubt, do try this.


Stencils and masks can be loads of fun. They can add depth and interest as well as change the focus within your painting.
If there is an area your a bit disappointed in, you can camouflage it using textures either stippled on top, or stencilled. You may want to create more interest in an area or soften a section.
If you are using stencils or make, the number one tip I can give you is to remember that 'water is the enemy of the stencil' your paint needs to be used fairly dry, sponge or stipple it on.

Step 3
Backgrounds seem to unnerve people so adding something really dramatic can be rather fun if not perhaps a little daunting. If you want to play safe, use the same colours as you have used within the painting already, or perhaps try to add something totally different especially if you plan to add more layers on top.

Step 4

If you fancy doing a bit more of this kind of thing, there is some stencil work in my Water soluble Media book and on the DVD there is a nice piece of film footage of my completing some sunflowers using stencils as a bonus section at the end of the DVD. You can watch the entire creative process to music. 
Anyway, I hope today's post inspires you to get your paints out and do some watercolour doodling of your own.

Thursday, 24 March 2016

London Street Scene demo

I often demonstrate at Art Societies and usually complete two paintings during a 2 hour demo, however, I get so carried away with the painting process that I never remember to take photos, but on this occasion Terry used my iPad and remembered to take a few as I was painting.


This first photo gives you an idea of the initial stages in the painting process, I have applied masking fluid onto the dry paper on the brightest areas, once this is dry, I then begin by flooding in wet into wet washes over the entire page, this gets rid of all the white paper.

I would never paint watercolour upright like this at home, I would paint either completely flat or on a slight slope, but I often paint upright when demonstrating so that an audience can watch the process. It means I have to work quickly, control the paint and fight against gravity! It certainly keeps me on my toes!

Once this first stage is dry I then begin overlaying my next blocks of wet into wet colour, allowing the colours to meet and merge as I go along.


This gives you a better idea of how its all looking at this stage. I avoid any details, its just a question of placing the distant dark areas and leaving all the light ones, (which is the first wash I already applied).
There is a natural place to start from in the distance so when I add the right side of the street,  this will appear darker and closer.


The right side of the street goes in next which also includes parked cars. I really like the way light falls on cars on a street.... I know, how strange, but the clutter of a street scene is such a challenge and the finished result would not look half as nice if the cars were not there.
I love these figures crossing the street, they give the painting a real feeling of movement.


This is my painting before the masking is removed and the final tonal adjustments made. Its quite a lot to get through in an hour, especially as I let the audience know what colours I am using and why I choose to do what I do, as I go along.
I do however use a hair dryer, this speeds things up a bit of course.


The darks then go in, then  just prior to the coffee break the masking is removed  and voila! this is the finished result.  I can now relax, enjoy a chat with the audience and answer any questions before beginning my second painting in part two.

One of my favourite colours is 'shadow' this is the colour I use to create all those lovely darks. Its a gorgeous aubergine sort of colour - really sumptuous.
If you want less of an aubergine colour and warmer then 'burnt shadow' is also fab, it flocculates and creates some lovely textural interest.

I have used Bockingford 140lb watercolour paper (brilliant if you intend to use masking fluid, because it rubs off really easily)

If you look in my gallery you will see this painting in a cropped version, I decided to concentrate on the lower section for more impact and painted it on a canvas.

Friday, 18 March 2016

Painting figures using watercolour

Keeping things simple when it comes to painting, seems to be one of the hardest things for many people. Its easier to try and put everything into a painting, especially if the reference is a photo, than to remove things, how much should we remove? How do we know exactly what to remove?
It can be a really good idea to make a hatched drawing, moving the pencil quickly in one direction, pressing harder for a darker tone and applying less pressure for a lighter tone.

At the art academy in Belgium, we made hundreds of these type of drawings using plasters as our reference. I would go into college in the evening and sit in front of various classical busts, using just line to portray tone. It was a great way to learn how to look, establish tone and suggest light.Such a classical training has been a wonderful advantage to my paintings.

These type of drawings can then lend themselves to simple watercolour studies. Using a very limited palette, I look at the tonal blocks and quickly, I place the colour onto the dry paper using my Classic brush, well loaded with paint. I invite some colours to merge into others leaving tiny little dry sections which act as barriers, trapping the paint on either side and suggesting light. Its all done in one stage, in one go. Yes, I know it seems scary, but its really fun.


 This next technique is much more controlled, its slower, but just as wet. Indeed, the wetter it is, the better, giving me more time to think. 

This is painted as one shape. I know your probably thinking its more than one shape, but actually all the little blocks of colour are linked, they all touch.
I begin with the girls head working down the body and arms, then the legs and whilst its all still wet I attach the pram. Its really important that the shape remains wet, otherwise it looks as if the pram is not attached to the girl. I add the shadow last, hoping that some of the shoes and the pram wheels are still a little damp so that the colour seeps a little into the shadow.

When you are learning to paint, you can be taught various techniques, but learning to look is the most important skill you can aquire. The subjects we choose to paint are also important, you really have to want to paint them, they have to inspire you.